Building a set of stairs might seem intimidating, but here’s a secret that professional carpenters know: it’s all about right triangles. When you learn how to calculate stair stringers using basic trigonometry, you’ll transform a daunting project into a series of simple, repeatable measurements. Whether you’re building deck stairs, basement steps, or a backyard access point, this guide will walk you through every calculation you need.
Understanding the geometry behind stair construction doesn’t just make your project easier—it ensures your stairs are safe, comfortable, and compliant with building codes. Let’s break down the math step by step.
What Is a Stair Stringer?
Stair Stringer Anatomy
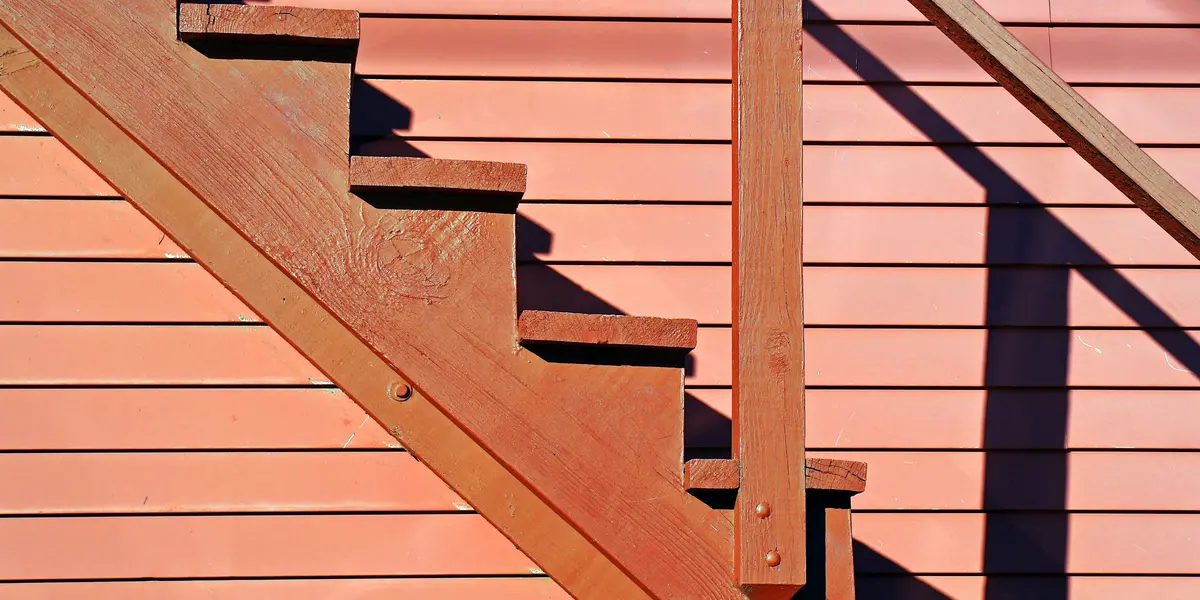
A stair stringer is the angled, saw-toothed board that supports your treads (the part you step on) and risers (the vertical part between steps). Most residential stairs have either two or three stringers running from the top landing to the bottom floor.
Here’s where trigonometry comes in: your stringer forms the hypotenuse of a right triangle. The total rise (vertical height) is one leg, and the total run (horizontal distance) is the other leg. Every cut you make involves understanding this relationship.
Your entire staircase is one big right triangle. The floor is the base, the wall or vertical rise is the height, and the stringer runs diagonally—just like the hypotenuse in your triangle calculations.
US Building Code Requirements You Must Know
Before grabbing your calculator, you need to understand the dimensional constraints that building codes require. These aren’t arbitrary—they’re based on decades of safety research.
Standard Dimensions (International Residential Code)
The IRC stair requirements specify the following dimensions:
| Measurement | Minimum | Maximum | Ideal Range |
|---|---|---|---|
| Riser Height | 4 inches | 7¾ inches | 7” - 7½” |
| Tread Depth | 10 inches | — | 10” - 11” |
| Headroom | 6’ 8” | — | 7’+ |
| Stair Width | 36 inches | — | 36”+ |
Your local building codes may be stricter than IRC minimums. Always check with your local building department before starting. Stairs that don’t meet code can fail inspection and—more importantly—cause serious injuries.
The 7-11 Rule
Many carpenters follow the “7-11 rule” as a starting point: 7-inch risers and 11-inch treads. This combination feels natural to climb and typically satisfies code requirements. We’ll use this as our baseline for examples.
Gathering Your Measurements
Before any calculations, you need two critical measurements:
Step 1: Measure Total Rise
Total rise is the vertical distance from the finished floor at the bottom to the finished floor at the top. This must be precise.
- Use a level and straightedge, or a laser level
- Measure from where the bottom of the stairs will land to the top landing surface
- Account for any flooring that hasn’t been installed yet
- Measure twice (or three times)!
Example: Let’s say your total rise is 98 inches (about 8 feet 2 inches).
Step 2: Determine Available Run Space
Total run is the horizontal distance your stairs will cover. This might be constrained by your space, or you might have flexibility.
Calculating Individual Rise and Run
Now comes the math. We need to divide our total rise into equal steps that fall within code requirements.
Finding the Number of Steps
Number of Risers
Number of Risers = Total Rise ÷ Target Riser Height
Example calculation:
- Total rise: 98 inches
- Target riser height: 7 inches
- 98 ÷ 7 = 14 risers
Since we got a whole number, we’re in good shape. But what if it doesn’t divide evenly?
Let’s try another example:
- Total rise: 102 inches
- Target riser height: 7 inches
- 102 ÷ 7 = 14.57 risers
You can’t have a fraction of a step! Here’s what to do:
- Round to the nearest whole number: 15 risers
- Recalculate the actual riser height: 102 ÷ 15 = 6.8 inches
Check: 6.8 inches falls between 4” and 7¾” ✓
If your calculated rise is too high or too low, try adding or removing a step. For 102 inches: with 14 risers you get 7.29” (acceptable), and with 15 risers you get 6.8” (also acceptable). Choose based on comfort and available run space.
Calculating Individual Tread Depth (Unit Run)
Now we need to determine our tread depth. There’s a time-tested formula that relates rise and run for comfortable stairs:
Rise + Run Comfort Formula
Rise + Run = 17 to 18 inches (optimal comfort range)
Using our example (6.8-inch rise):
- 17 - 6.8 = 10.2 inches (minimum comfortable run)
- 18 - 6.8 = 11.2 inches (maximum comfortable run)
Let’s choose 10.5 inches for our tread depth.
Calculating Total Run
Total Run
Total Run = Unit Run × (Number of Risers - 1)
Why minus one? Because you have one fewer tread than risers—the top “tread” is actually the landing.
Example:
- Unit run: 10.5 inches
- Number of risers: 15
- Total run: 10.5 × 14 = 147 inches (12 feet 3 inches)
Make sure you have this much horizontal space available!
Calculate Your Triangle MeasurementsFinding the Stringer Length and Angle
This is where trigonometry really shines. Your stringer is the hypotenuse of a right triangle, and we need to know both its length and the angle to cut it properly.
Method 1: Pythagorean Theorem for Stringer Length
Stringer Length
Stringer Length = √(Total Rise² + Total Run²)
Example:
- Total rise: 102 inches
- Total run: 147 inches
- Stringer length = √(102² + 147²)
- Stringer length = √(10,404 + 21,609)
- Stringer length = √32,013
- Stringer length ≈ 179 inches (about 14 feet 11 inches)
This tells you the minimum board length you need. Always buy longer than calculated to account for cuts and any defects in the lumber.
Use the Pythagorean Theorem CalculatorMethod 2: Finding the Stringer Angle
The angle of your stringer determines how steep your stairs feel and affects your layout cuts. Use the tangent function:
Stringer Angle
tan(θ) = Total Rise ÷ Total Run
Example:
- tan(θ) = 102 ÷ 147
- tan(θ) = 0.694
- θ = arctan(0.694)
- θ ≈ 34.8 degrees
This angle (roughly 35°) falls well within the comfortable range of 30° to 37° for residential stairs.
Stair angles between 30° and 35° feel gradual and easy to climb. Angles between 35° and 37° are steeper but still code-compliant. Anything over 37° starts feeling like a ladder!
Why the Angle Matters
When you set your framing square to lay out the cuts on your stringer, you’re essentially creating the rise and run for each step. The angle determines:
- How the stringer sits against the header and floor
- The plumb cut at the top (vertical cut that rests against the header)
- The seat cut at the bottom (horizontal cut that rests on the floor)
Step-by-Step Stringer Layout Example
Let’s put it all together with a complete worked example.
The Scenario
You’re building deck stairs with:
- Total rise: 48 inches (from ground to deck surface)
- Available run: approximately 60 inches
Step 1: Calculate Number of Risers
- Target riser height: 7 inches
- 48 ÷ 7 = 6.86 risers
- Round to: 7 risers
- Actual unit rise: 48 ÷ 7 = 6.86 inches (rounds to 6⅞”)
Step 2: Calculate Unit Run
- Using comfort formula: 17.5 - 6.86 = 10.64 inches
- Round to: 10.5 inches (or 10½”)
- Verify: 6.86 + 10.5 = 17.36 ✓ (within 17-18 range)
Step 3: Calculate Total Run
- Unit run × (risers - 1)
- 10.5 × 6 = 63 inches
- This fits our available 60+ inch space ✓
Step 4: Calculate Stringer Length
- √(48² + 63²)
- √(2,304 + 3,969)
- √6,273
- 79.2 inches (approximately 6 feet 8 inches)
- Buy 8-foot 2×12 boards for your stringers
Step 5: Calculate Stringer Angle
- tan(θ) = 48 ÷ 63 = 0.762
- θ = arctan(0.762)
- θ ≈ 37.3 degrees
Always use 2×12 lumber for stringers. After cutting the notches, you need at least 3½ inches of solid wood remaining below the tread cut for structural integrity—code requires this minimum.
Using a Framing Square
Your framing square is your best friend for laying out stringers. Here’s how to use your calculations:
- Mark your rise and run on the square using stair gauges (small clamps)
- Position the square so your unit rise (6⅞”) aligns on one edge and unit run (10½”) aligns on the other edge of the board
- Trace the outline for your first step
- Slide the square along to mark each subsequent step
- Repeat until you’ve marked all steps
Adjusting for Tread Thickness
Here’s a detail many DIYers miss: if your treads are 1-inch thick lumber (which is actually ¾” after milling) or 2-inch thick lumber (actually 1½”), you need to subtract the tread thickness from your first riser height.
Why? Because once you install the tread, it adds height to every step equally—except the bottom step, which doesn’t have a tread below it.
Example: With 1½” thick treads and a 6⅞” unit rise:
- Cut your first riser at: 6.875 - 1.5 = 5.375 inches (about 5⅜”)
Common Mistakes to Avoid
Measuring from the wrong point: Always measure from finished floor to finished floor, not subfloor to subfloor.
Forgetting the tread thickness adjustment: Your bottom step will be too tall without this correction.
Inconsistent risers: Code requires all risers to be within ⅜” of each other. Inconsistent steps cause trips and falls.
Inadequate stringer depth: After cutting, ensure at least 3½” of board remains below the tread notch.
Verifying Your Work
Before cutting expensive lumber, verify your calculations:
-
Double-check total rise: Unit rise × number of risers = total rise
- 6.86” × 7 = 48.02” ✓ (close enough to 48”)
-
Verify total run: Unit run × (risers - 1) = total run
- 10.5” × 6 = 63” ✓
-
Check the angle makes sense: 30°-37° for comfortable residential stairs
- 37.3° ✓ (on the steeper end but acceptable)
-
Confirm code compliance:
- Rise: 6.86” (between 4” and 7¾”) ✓
- Run: 10.5” (minimum 10”) ✓
Quick Reference Formulas
Here’s a summary of all the trigonometry formulas you need:
Complete Stringer Calculation Formulas
Number of Risers = Total Rise ÷ Target Rise (round to whole number) Unit Rise = Total Rise ÷ Number of Risers Unit Run = 17.5 - Unit Rise (for comfort) Total Run = Unit Run × (Number of Risers - 1) Stringer Length = √(Total Rise² + Total Run²) Stringer Angle = arctan(Total Rise ÷ Total Run)
Putting It All Together
Calculating stair stringers is really just applying right triangle math to a practical problem. Once you understand that your staircase is a right triangle—with the rise as one leg, the run as the other, and the stringer as the hypotenuse—the calculations become straightforward.
Remember these key points:
- Always start with accurate measurements of your total rise
- Keep individual risers between 7” and 7¾” for comfort and code compliance
- Use the rise + run = 17-18 formula for comfortable treads
- The Pythagorean theorem gives you stringer length
- The tangent function gives you the stringer angle
- Don’t forget to subtract tread thickness from the bottom riser
With these calculations in hand, you’ll approach your stair project with confidence. Take your time with the math, measure carefully, and you’ll build stairs that are safe, comfortable, and built to last.
Try Our Right Triangle Calculator for Your Next ProjectFor more practical applications of triangle math in your DIY projects, check out our guides on roof pitch calculation and feet and inches conversions for construction. And if you’re working with ladders to access your new stairs, don’t miss our guide on ladder safety and the 4-to-1 rule.