There’s a reason master carpenters were once called “geometers of wood.” Every miter joint, every cabinet door, and every picture frame you’ve ever admired exists because someone understood the intimate relationship between geometry and woodworking. Whether you’re a professional craftsman or a weekend DIYer, understanding the math behind your cuts transforms guesswork into precision and frustration into confidence.
In this comprehensive guide, we’ll explore how geometric principles power the most common woodworking techniques—from cutting perfect picture frame miters to building square cabinets and creating strong joinery. Best of all, we’ll show you how professionals use this knowledge once to build jigs and tools that make precision repeatable without pulling out a calculator every time.
Why Geometry Matters in Woodworking
Woodworking is fundamentally about creating precise shapes that fit together perfectly. When a cabinet door hangs crooked or a picture frame has gaps at the corners, it’s almost always a geometry problem—not a skills problem.
Understanding the underlying math helps you:
- Predict outcomes before making cuts
- Troubleshoot problems when joints don’t fit
- Build custom jigs that guarantee accuracy
- Waste less material through accurate planning
- Achieve professional results consistently
The real power of understanding geometry isn’t doing mental math for every cut—it’s knowing enough to build tools and jigs that handle the calculations for you automatically.
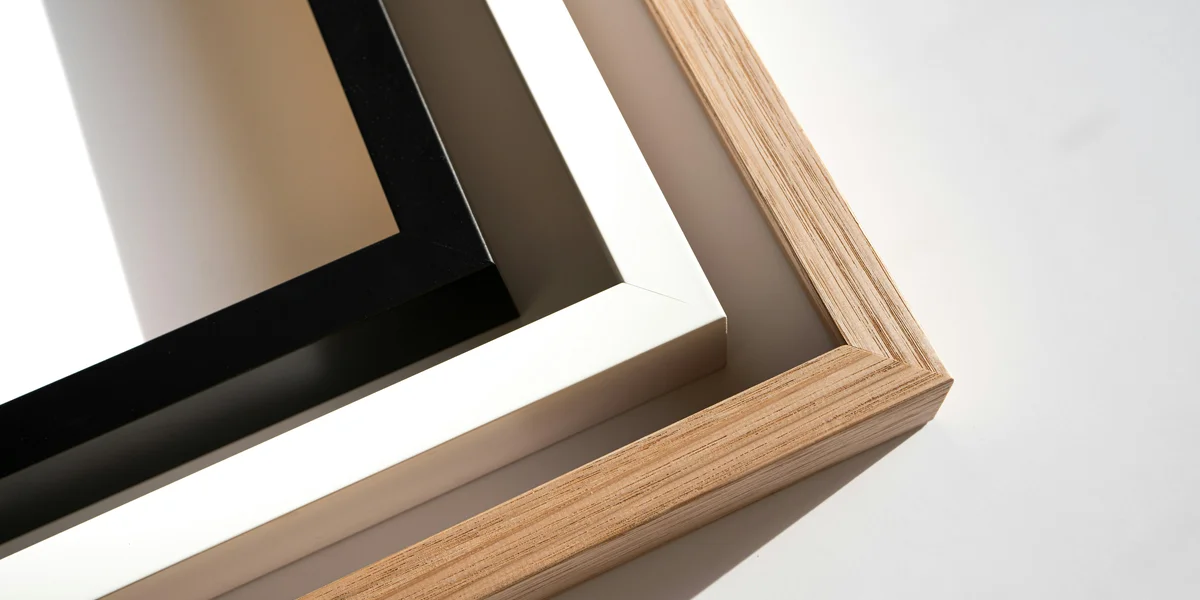
Picture Frames: The Art of the Miter Joint
The 45° Miter Joint
The Basic 45-Degree Miter
Picture frames are where most woodworkers first encounter applied geometry. A rectangular frame has four corners, and each corner consists of two pieces meeting at a miter joint. Since a rectangle’s corners are 90 degrees, each piece must be cut at exactly 45 degrees.
The principle is simple: the miter angle is always half of the corner angle you’re creating. For a standard picture frame, that’s 90° ÷ 2 = 45°. Resources like Fine Woodworking techniques can help you master these fundamental cuts.
Miter Angle Formula
Miter Angle = Corner Angle ÷ 2
This same logic applies whether you’re building a rectangular frame, a hexagonal mirror, or an octagonal gazebo. A hexagon has 120° corners, so you’d cut 60° miters. An octagon has 135° corners, giving you 67.5° miters.
Always measure miter cuts at the longest point (outside edge for frames). This is the industry standard and prevents confusion when setting up your saw.
Calculating Frame Dimensions
When framing an 8” × 10” photograph with 2” wide molding, your cut lengths are straightforward:
- Short pieces: 8” + (2 × 2”) = 12” at the long point
- Long pieces: 10” + (2 × 2”) = 14” at the long point
Frame Piece Length
Cut Length = Inside Dimension + (2 × Molding Width)
Once you understand this pattern—inside dimension plus twice the molding width—you’ll never need to think about it again.
The Miter Sled: Do the Math Once
Here’s where professionals separate themselves from hobbyists: instead of setting and resetting their miter saw for every project, they build dedicated jigs.
A picture frame miter sled for your table saw locks in that perfect 45° angle permanently. You build it once, verify it with test cuts, and then every miter you cut for the rest of your life is dead-on accurate. The sled has a fence at exactly 45° to the blade, and all you do is hold your workpiece against it.
The geometry you learned helps you:
- Set up the sled correctly the first time
- Verify it’s accurate using test cuts
- Troubleshoot if something goes wrong later
This is the professional approach: understand the math deeply enough to build tools that eliminate the need for ongoing calculations.
Calculate Special Angle RelationshipsCabinetry: Ensuring Square and Level
The 3-4-5 Method for Squaring
Professional cabinet makers live and die by one principle: everything must be square. A cabinet that’s even slightly out of square will have doors that don’t close properly, drawers that bind, and an overall appearance that just looks “off.”
The 3-4-5 method comes directly from the Pythagorean theorem. A triangle with sides of 3, 4, and 5 units will always form a perfect 90-degree angle.
Pythagorean Theorem
a² + b² = c²
3-4-5 Verification
3² + 4² = 9 + 16 = 25 = 5²
How to use it in practice:
- Measure 3 feet along one edge of your cabinet
- Measure 4 feet along the adjacent edge
- The diagonal between these points should be exactly 5 feet if the corner is square
For larger projects, use multiples: 6-8-10 or 9-12-15. For smaller work, use inches instead of feet. Any multiple works because the proportions stay the same. You can find helpful woodworking angle guides at Rockler to assist with precise measurements.
The 3-4-5 triangle is a Pythagorean triple—a set of whole numbers that perfectly satisfy the Pythagorean theorem. Other common triples include 5-12-13 and 8-15-17, but 3-4-5 is the easiest to remember and apply.
The Story Stick: A Carpenter’s Secret Weapon
Rather than calculating dimensions repeatedly, experienced woodworkers use story sticks—simple pieces of wood with all the critical measurements marked directly on them.
Building a run of kitchen cabinets? Create a story stick that shows:
- Cabinet height
- Shelf positions
- Drawer divider locations
- Face frame dimensions
You figure out the geometry once, mark it on the stick, and then transfer those marks to every piece. No tape measures, no calculators, no accumulated measurement errors.
The story stick embodies a core professional principle: do the thinking once, then let your tools do the remembering.
Checking Diagonals
When building a rectangular cabinet carcass, measuring the diagonals is the quickest way to verify square. If both diagonals are equal, your cabinet is square—you don’t even need to calculate what the diagonal should be.
But if you want to verify your diagonal measurement, it’s simply the square root of (width² + height²). For a 24” × 30” cabinet:
Diagonal Calculation
d = √(24² + 30²) = √(576 + 900) = √1476 ≈ 38.42”
Both diagonals should match this number exactly.
Calculate Diagonal MeasurementsJigs and Sleds: Precision You Can Repeat
This is where understanding geometry really pays dividends. Professional shops are filled with custom jigs—each one representing a geometric problem that’s been solved permanently.
The Crosscut Sled
A basic crosscut sled guarantees perfect 90° cuts every time. The geometry is built into the sled’s construction: the fence is set exactly perpendicular to the blade using the 3-4-5 method during construction. Once it’s right, it stays right for years.
The Miter Sled
For frames and other angled work, a miter sled locks in your desired angle. Some woodworkers build adjustable versions with detents at common angles (22.5°, 30°, 45°, 60°), while others build dedicated sleds for their most-used angles.
Dovetail Jigs
Dovetail joints require specific angles—typically around 7-10° depending on the wood. Instead of marking each tail by hand, most woodworkers use:
- Dovetail markers: Simple aluminum or brass guides set to the correct angle
- Dovetail templates: Router jigs that cut perfect joints every time
The angle gets dialed in once based on your wood species (steeper for softwoods, shallower for hardwoods), and then the jig handles the geometry forever.
Tapering Jigs
Need to cut consistent tapers on table legs? A tapering jig holds the workpiece at a precise angle to the blade. You calculate the taper ratio once, build the jig to that specification, and then cut identical tapered legs all day without any additional math.
Many excellent jigs are available commercially, but building your own teaches you the underlying geometry. When something goes wrong—and eventually it will—that knowledge helps you diagnose and fix the problem.
Joinery: Where Angles Create Strength
Dovetail Joints
Dovetail joints are prized for their mechanical strength and visual appeal. The angled “tails” and “pins” interlock to resist pulling forces.
Traditional dovetail angles vary by wood type:
- Softwoods: Steeper angle (around 1:6 ratio, or about 9.5°)
- Hardwoods: Shallower angle (around 1:8 ratio, or about 7°)
To calculate the exact angle from a ratio, you use the arctangent function:
Dovetail Angle from Ratio
Angle = arctan(1 ÷ ratio) = arctan(1/8) ≈ 7.1°
Most woodworkers don’t calculate these angles—they buy or make a dovetail marker set at the appropriate ratio and use it as a guide. The geometry is embedded in the tool.
Mortise and Tenon Proportions
The mortise and tenon is perhaps woodworking’s most fundamental joint. The traditional rule of thumb:
- Tenon thickness = roughly 1/3 of stock thickness
- Tenon length = 3-5 times the stock thickness
For 3/4” material, that means roughly 1/4” thick tenons, about 3” long. These proportions maximize strength while leaving enough material around the mortise to prevent splitting.
Rather than calculating for each project, many woodworkers set up their mortising machine or router table once for their most common stock thickness and leave it.
Compound Angles
Compound angles—like the legs of a splayed stool—require cuts across two planes simultaneously. This is where the math gets genuinely complex, involving both miter and bevel angles that interact in non-intuitive ways.
When cutting compound angles, the miter and bevel settings on your saw don’t simply equal the angles you see in your design. The relationship between them is trigonometric and non-linear. Always verify with test cuts on scrap before cutting good material.
The good news? Once you’ve calculated the correct compound angle for a project, you can:
- Build a dedicated jig for that specific cut
- Record the saw settings for future reference
- Use a compound miter chart (available online and in many woodworking books)
Professional furniture makers often keep notebooks with compound angle settings for their standard designs.
Solve Complex Angle ProblemsEssential Tools and Their Built-In Geometry
The Framing Square
A quality framing square has tables stamped right into the metal that let you determine rafter angles, brace lengths, and stair layouts. The geometry is literally built into the tool—you just need to know how to read it.
The framing square works because of the relationships in right triangles. When you align the tongue (short side) and blade (long side) with specific numbers, you’re creating a right triangle with known proportions.
The Combination Square
This tool gives you instant access to 45° and 90° angles without any calculation. The 45° face creates a right isosceles triangle, which means the diagonal of any square is its side length times √2 (approximately 1.414).
Square Diagonal
Diagonal = Side × √2 ≈ Side × 1.414
The Bevel Gauge
A bevel gauge captures and transfers angles from one place to another. Combined with a protractor or angle finder, it lets you replicate any angle without doing trigonometry—you’re just copying what already exists.
The Professional Mindset: Calculate Once, Cut Forever
Watch an experienced woodworker, and you’ll notice something surprising: they rarely pull out a calculator. That’s not because they’ve memorized formulas—it’s because they’ve invested time upfront to eliminate repetitive calculations.
Their shop contains:
- Jigs that guarantee specific angles
- Story sticks with project dimensions marked
- Templates for common shapes
- Setup blocks for frequently-used machine settings
Each of these represents a geometric problem that’s been solved once and captured in physical form.
Every time you find yourself making the same calculation twice, consider building a jig. A crosscut sled, miter sled, and a set of setup blocks will handle 80% of common woodworking geometry automatically.
Common Mistakes and How to Avoid Them
Mistake 1: Assuming Walls and Floors Are Square
Before building built-in cabinets, use the 3-4-5 method to check room corners. Professional installers expect walls to be out of square and plan accordingly—scribing pieces to fit actual conditions rather than theoretical perfect angles.
Mistake 2: Measuring Each Piece Independently
Small errors compound. Instead, use a story stick or cut multiple pieces using the same stop block setup. This way, even if your measurement is slightly off, all pieces will be consistently off—and they’ll still fit together.
Mistake 3: Not Verifying Your Jigs
Jigs can drift out of alignment over time, especially if they get dropped or bumped. Periodically verify your crosscut sled’s 90° angle using the 5-cut method, and check miter sleds with test cuts on scrap.
To verify a crosscut sled: make five consecutive cuts on a wide board, rotating it 90° between each cut. Measure the final piece’s width at both ends. Any error in your sled’s angle gets multiplied by four, making tiny errors obvious and measurable.
Mistake 4: Forgetting Kerf Allowance
Every saw blade removes material—the “kerf.” When cutting multiple pieces from one board, failing to account for kerf can leave your final piece short. A typical table saw blade removes about 1/8” per cut.
Putting It All Together: A Practical Example
Let’s say you’re building a simple box with mitered corners—like a planter or a decorative storage box. Here’s how geometry guides every step:
- Determine corner angles: 90° corners require 45° miters
- Calculate cut lengths: Inside dimension + (2 × material thickness)
- Verify square: Check diagonals are equal before gluing
- Use the 3-4-5 method: Confirm corners are truly 90°
For a box with 10” inside dimensions using 3/4” thick wood:
- Cut length at long point = 10” + (2 × 0.75”) = 11.5”
- All four pieces cut at 45° miter
Conclusion: Geometry as Your Workshop Partner
The connection between geometry and woodworking runs deep. But the goal isn’t to become a mathematician—it’s to understand the principles well enough to build systems that make precision automatic.
The most skilled woodworkers aren’t doing trigonometry in their heads. They’re using jigs, sleds, story sticks, and templates that encode geometric relationships in physical form. They did the math once, verified it worked, and now they can focus on the craft rather than the calculations.
Understanding the fundamentals matters because it helps you:
- Build accurate jigs the first time
- Troubleshoot when something isn’t fitting
- Adapt to new situations confidently
- Know why your techniques work
The Pythagorean theorem that helped ancient builders create the pyramids is the same theorem that makes your crosscut sled cut perfect 90° angles. The special triangle relationships that math students learn in school are the same relationships that let you cut perfect octagons and hexagons.
Learn it, build tools that embody it, and watch your woodworking reach new levels of precision and craftsmanship.
Try Our Right Triangle Calculator for Your Next Project